Windows activation on Core without Internet connection

Our Windows Core Domain controller installations do reside in a place without internet connectivity so activating

Windows activation on Core without Internet connection

Install the Key, if you did not during installation:

cscript windows\systen32\slmgr.vbs –ipk ABCDE-FGHIJ-KLMNO-PQRST-UVWXY

If the Server would have internet access, the activation would work with:

cscript windows\systen32\slmgr.vbs –ato

For the net connected Server wi do have to phone Microsoft

To get the installation ID:

cscript windows\systen32\slmgr.vbs –dti

To get the installation into a textfile

cscript windows\systen32\slmgr.vbs –dti >>C:\act.txt

Call Microsoft, you will then get a confirmation ID

Enter the received confirmation ID:

cscript windows\systen32\slmgr.vbs –atp 1234567890123456789012345678901234567890

Enable LDAP over SSL for AD

We will need LDAPS later on for the two factor authentication, using openOTP
The suggested solution of the OpenOTP is not best practice, they suggest setting up a CA on the domain controller.

This Microsoft article is providing the necessary information’s

http://social.technet.microsoft.com/wiki/contents/articles/2980.ldap-over-ssl-ldaps-certificate.aspx

Template – Enhanced Key Usage – Server Authentication (1.3.6.1.5.5.7.3.1) is important

Place the certificate

how to add the certificate to the NTDS service’s Personal certificate store

http://technet.microsoft.com/en-us/library/dd941846(WS.10).aspx

for troubleshooting

http://support.microsoft.com/kb/938703

Requesting and installing a certificate

Create the CSR

Logon

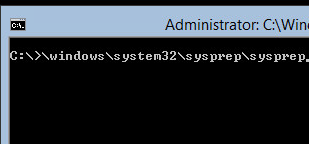
Create a CSR on the core server

certreq -new c:\temp\cert.inf c:\temp\certrequest.req

the cert.inf file:

[NewRequest]
Subject=”C=CH,S=ZH,L=Zurich,O=Company,OU=IT,CN=server.domain.local”
PrivateKeyArchive=FALSE
Exportable=FALSE
UserProtected=FALSE
MachineKeySet=TRUE
ProviderName=”Microsoft RSA SChannel Cryptographic Provider”
ProviderType=12
UseExistingKeySet=FALSE
RequestType=PKCS10
HashAlgorithm=sha256
KeyLength=4096
KeyUsage = 0xF0 ; Digital Signature, Key Encipherment, Nonrepudiation, Data Encipherment
KeySpec=1
[EnhancedKeyUsageExtension]
OID=1.3.6.1.5.5.7.3.1 ; Server Authentication

Sign the Certificate at the CA

Install the certificate

certreq -accept c:\temp\SignedCertificate.cer

Install the Root certificate

Do not forget to install the root certificate into the machine “trusted store”

Certutil –addstore –f “TrustedPublisher” c:\temp\root.cer

Verification

After a certificate is installed, follow these steps to verify that LDAPS is enabled:

  1. Start the Active Directory Administration Tool (Ldp.exe)
  2. On the Connection menu, click Connect.
  3. Type the name of the LDAP server (e.g. domain controller or AD LDS/ADAM server) to which you want to connect.
  4. Type 636 as the port number.
  5. Click OK.

Debug in case of problems

Certutil –VerifyStore MY


result:

MY “Personal”

================ Certificate 0 ================

Serial Number: 75000000088db1a509904b6eff000000000008

Issuer: CN=XCA01-CA

NotBefore: 24.06.2015 09:03

NotAfter: 24.06.2016 09:13

Subject: CN=xdc01.xjbk.local

Non-root Certificate

Cert Hash(sha1): 1e 8b df 3f 67 1c 18 fe a9 7d 2b 32 0d d2 1a a3 9f 17 8c fd

Key Container = 87698826a058b37df04eac8a815a9b98_837e2fc9-5182-4419-9660-e414d

e50a998

Simple container name: CertReq-0ecbfed1-329c-4ac6-a5ec-246aa7b87939

Provider = Microsoft RSA SChannel Cryptographic Provider

Private key is NOT exportable

Encryption test passed

Revocation check skipped — server offline

Certificate is valid

CertUtil: -verifystore command completed successfully.

Technical Information:

How to enable LDAP over SSL with external CA

https://support.microsoft.com/de-ch/kb/321051/en-us

https://technet.microsoft.com/en-us/library/cc736326.aspx

Install an Read only Domain controller (RODC)

  • Create a VM
  • Install Windows 2012R2 Core
  • If from a Template – run sysprep
  • Install VMWare tools
  • Change name
  • Change IP Address to fix and the DNS server

Make sure the IP address is set to fix and the computer name is change!

Join the Domain

In Power Shell:

Add-Computer -DomainName domain.local

Setup RODC role

Install-WindowsFeature AD-Domain-Services

Install-ADDSDomainController -DomainName domain.local -installDNS:$true -ReadOnlyReplica:$true -Credential (Get-credential) -SiteName Default-First-Site-Name

Credetials: Domain\Administrator

Enter the recovery password twice

(Document the recovery password on a safe and secure place!!)

Install second Domain Controller

Create a VM

  • Install Windows 2012R2 Core
  • If from a Template – run sysprep
  • Install VMWare tools
  • Change name
  • Change IP Address to fix and the DNS server

Join the Domain

In Power Shell:

Add-Computer -DomainName domain.local

Reboot Server

Shutdown –r –t 0

Setup DC role

In Power Shell:

Install-WindowsFeature AD-Domain-Services

Install-ADDSDomainController –DomainName xjbk.local –installDNS:$true

Install first DC and AD/Forest

domain-serviceSetup DC Role and AD

Configure the Server as a domain controller and DNS server and setup the domain & forest

Install-WindowsFeature AD-Domain-Services


Install-ADDSForest –ForestMode “Win2012R2” –DomainMode “Win2012R2” –DomainName “domain.local” –DomainNetBIOSName “DOMAIN” –InstallDNS:$true –CreateDNSDelegation:$False

!! Attention !!

DomainNetBIOSName “DOMAIN” must be uppercase

Or you will face troubles when joining the vcenter later on

Deploy from a vmWare Template

Open vCenter
Select a matching template
Right click and choose

Enter the Name of the Server

and select a folder

Select the cluster

Select the host in the cluster

Select the storage

Set the proper Network

Sysprep

You need to generalize after the cloning

Enter

\windows\system32\sysprep\sysprep

Select OOBE

And don’t forget

Rename-computer, change Name

Note: you should not use sconfig for this if you do not want to have the hostname
in capital letters

Start Powershell

Enter “Powershell” at the prompt

Change Name of the Server

Rename-computer –NewName ComputerName

Reboot Server

Shutdown –r –t 0

Change IP Address to Fix

This can be done by sconfig as well

(just enter sconfig at the prompt)

Start Powershell

Enter “Powershell” at the prompt

Identify the NIC

Get-NETIPInterface

Set the IP V4 address

New-NetIPAddress -InterfaceIndex 12 -IPAddress 172.20.100.20 -PrefixLength 24 -DefaultGateway 172.20.100.1

Set the DNS address

Set-DNSClientServerAddress –InterfaceIndex 12 -ServerAddresses (“172.20.20.20”,“172.20.20.21”)

Configure the TCP/IP protocol with DNS settings

Nslookup

Enable Remote management

Enable-NetFirewallRule –displaygroup “Windows Remote Management”

Howto install a certificate from a standalone or non-Windows CA on a Windows 2012R2 Server

Logon to the console of the Windows 2012R2 Core server and execute:

certreq -new C:\temp\request.inf C:\temp\dc01.jbk.local.req

The request.inf file does have the following content:

   [NewRequest]

   Subject=”C=CH,S=ZH,L=Zurich,O=Home,OU=IT,CN=dc01.jbk.local”
   PrivateKeyArchive=FALSE
   Exportable=FALSE
   UserProtected=FALSE
   MachineKeySet=TRUE
   ProviderName=”Microsoft RSA SChannel Cryptographic Provider”
   ProviderType=12
   UseExistingKeySet=FALSE
   RequestType=PKCS10
   HashAlgorithm=sha256
   KeyLength=4096
   KeyUsage = 0xF0
   KeySpec=1

  [EnhancedKeyUsageExtension]

   OID=1.3.6.1.5.5.7.3.1 ; Server Authentication


Submit the CSR (Certificate Signing Request) to the CA

When you get back the signed certificate from your CA, then

certreq -accept C:\temp\dc01.jbk.local.cer


References :

Certreq.exe https://technet.microsoft.com/library/cc725793.aspx