Windows activation on Core without Internet connection

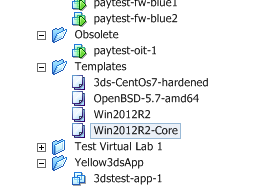
Our Windows Core Domain controller installations do reside in a place without internet connectivity so activating

Windows activation on Core without Internet connection

Install the Key, if you did not during installation:

cscript windows\systen32\slmgr.vbs –ipk ABCDE-FGHIJ-KLMNO-PQRST-UVWXY

If the Server would have internet access, the activation would work with:

cscript windows\systen32\slmgr.vbs –ato

For the net connected Server wi do have to phone Microsoft

To get the installation ID:

cscript windows\systen32\slmgr.vbs –dti

To get the installation into a textfile

cscript windows\systen32\slmgr.vbs –dti >>C:\act.txt

Call Microsoft, you will then get a confirmation ID

Enter the received confirmation ID:

cscript windows\systen32\slmgr.vbs –atp 1234567890123456789012345678901234567890

Install an Read only Domain controller (RODC)

  • Create a VM
  • Install Windows 2012R2 Core
  • If from a Template – run sysprep
  • Install VMWare tools
  • Change name
  • Change IP Address to fix and the DNS server

Make sure the IP address is set to fix and the computer name is change!

Join the Domain

In Power Shell:

Add-Computer -DomainName domain.local

Setup RODC role

Install-WindowsFeature AD-Domain-Services

Install-ADDSDomainController -DomainName domain.local -installDNS:$true -ReadOnlyReplica:$true -Credential (Get-credential) -SiteName Default-First-Site-Name

Credetials: Domain\Administrator

Enter the recovery password twice

(Document the recovery password on a safe and secure place!!)

Deploy from a vmWare Template

Open vCenter
Select a matching template
Right click and choose

Enter the Name of the Server

and select a folder

Select the cluster

Select the host in the cluster

Select the storage

Set the proper Network

Sysprep

You need to generalize after the cloning

Enter

\windows\system32\sysprep\sysprep

Select OOBE

And don’t forget

Rename-computer, change Name

Note: you should not use sconfig for this if you do not want to have the hostname
in capital letters

Start Powershell

Enter “Powershell” at the prompt

Change Name of the Server

Rename-computer –NewName ComputerName

Reboot Server

Shutdown –r –t 0

Change IP Address to Fix

This can be done by sconfig as well

(just enter sconfig at the prompt)

Start Powershell

Enter “Powershell” at the prompt

Identify the NIC

Get-NETIPInterface

Set the IP V4 address

New-NetIPAddress -InterfaceIndex 12 -IPAddress 172.20.100.20 -PrefixLength 24 -DefaultGateway 172.20.100.1

Set the DNS address

Set-DNSClientServerAddress –InterfaceIndex 12 -ServerAddresses (“172.20.20.20”,“172.20.20.21”)

Configure the TCP/IP protocol with DNS settings

Nslookup

Enable Remote management

Enable-NetFirewallRule –displaygroup “Windows Remote Management”